

I painted up a brock, part of a brock rider regiment. One. A singular Brock. He’s the guy in the header. And he’s painted. By me.
While I wait for the world to aplaud this great achivement, let me explain the why: A mate of mine has had his army in boxes for a few years now, waiting to be assembled. (Moving houses and a family does these things) In order to get him to start building and painting his force, I volunteered to build a regiment. Once I built the brock riders, I couldn’t resist painting one to help him started.
This blog post shows the process of the painting of this model. Therefore it has an intended audience of one. Anything more is just a bonus! Just keep in mind that this blog post is intended for an absolute starter in painting!
Tutorial
First I built the brock and spraypainted him black. Bear in mind that the spraypaint’s function is that paint now sticks to the model. It doesn’t have to be opaque, for if it does, it might blot out the detail of the model a bit.
For the same reason, always add water to any kind of paint before applying. In some cases (drybrushing comes to mind), just a wet brush does suffice, but in most cases, a few drops of water are stirred through the paint before using it.
Black of white undercoat?
There’s always the question which colour the basecoat needs to be, white or black.
For starting painters: black. The reason is this: if one misses one part of the model while painting, the black will show only as a shadow. A white basecoat will stick out! Also, the colour-build up from black up is far more natural than using a white basecoat.
That said, a white undercoat does have its advantages. Colours show far more vibrant over a white spray paint than over a black one. So, especially if your models are lightly coloured, a white basecoat will result in a more eye catching model.
Colours:
I use the Valejo game colour colour chart. There are other manifacturers which are just as good, I just happen to like (and use) Valejo.
First layer

The first layer is always the easiest. Thin down the paint a little more than usual, so the paint settles down into recesses and paint up the model. There’s no reason to be careful, as nearly all the model has to be painted the same base colour. I just left the armour plates bare, as they will have to be painted metal.
I used cold grey with a drop of black ink as base colour.
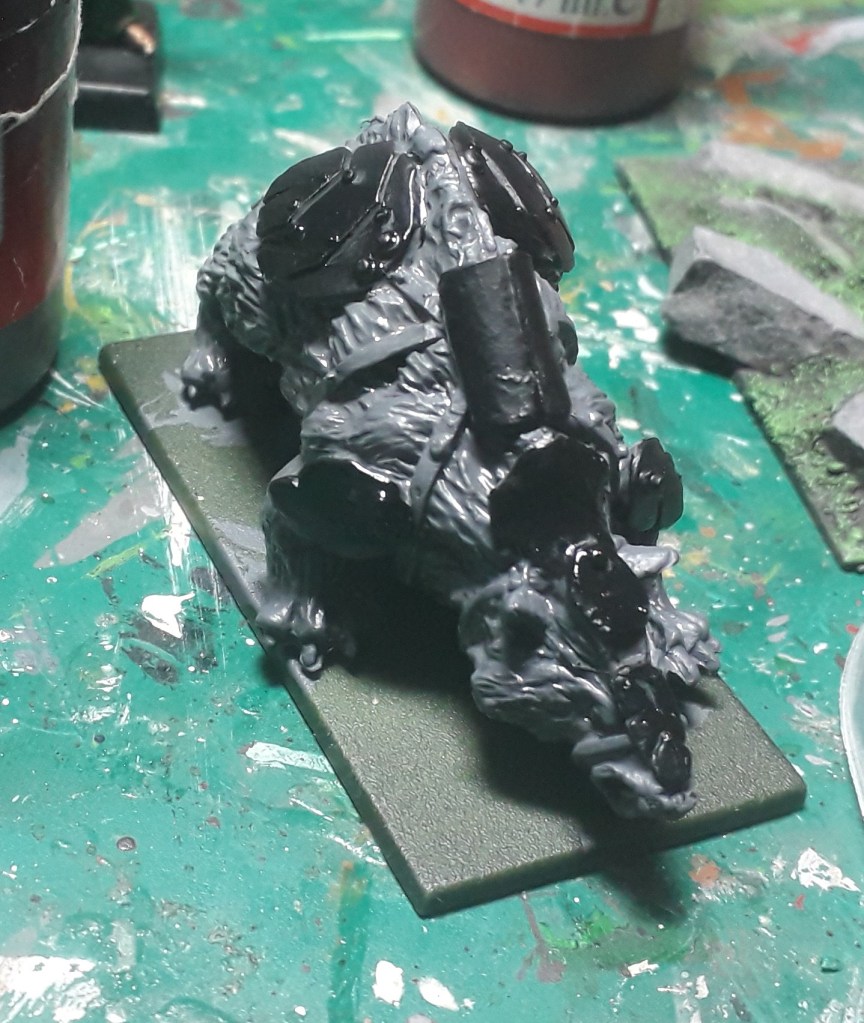
While the paint is drying, I painted up the armour plates black.
Black makes a great basecoat for any metalic colour.
The picture clearly shows neither paint is dry yet. After this process, the model needs 15-ish minutes to dry, so there’s time to paint up another few models.
Usually, models like this one are painted in batches of 3-10 at a time. Painting a single colour on a few models on a time cuts down on painting time drastically. A mate of mine can paint a regiment of 20 (!) foot soldiers in an evening in this way!

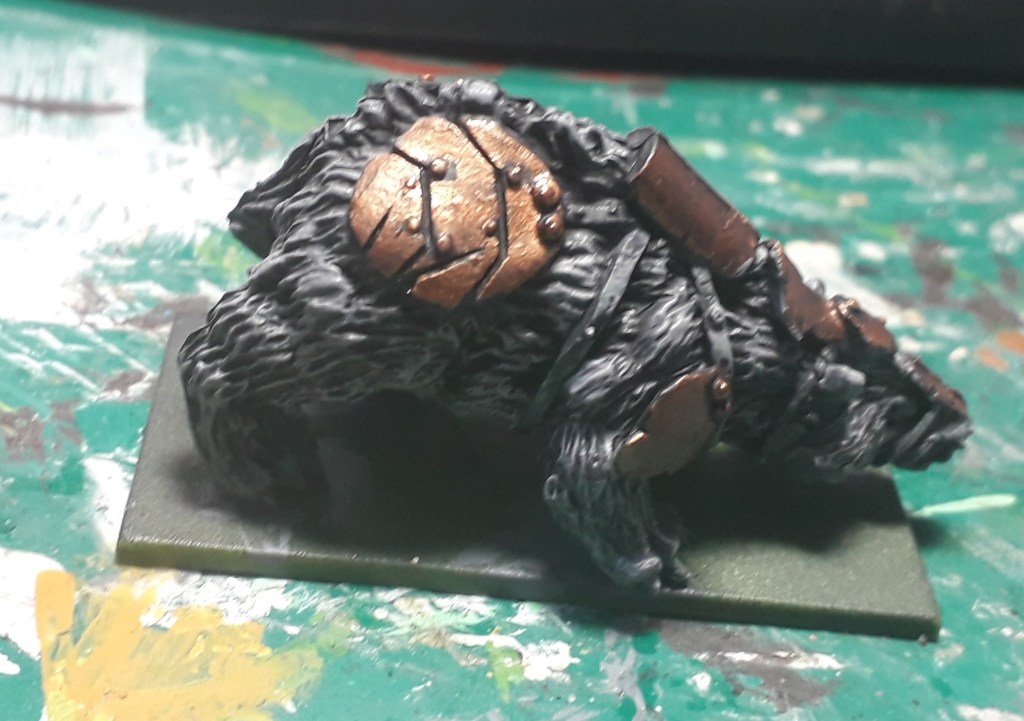
After having it dried well, I painted brassy brass over the armour plates. Metalic colours can be drybrushed (google the technique) on the model, while I take care to paint the elevated areas instead.
As soon as the model is dry again (and it needs to be 100% dry this time) you can ink it. I used a thinned down (50% ink/50% water) black ink wash for the entire model, both fur and armour.
The ink settles into the recesses of the model, creating a lot of shadow.
The ink needs to dry well. This is usually the part where I leave the model to dry overnight. That’s why you want a batch of models painted simulteneously, since spending two nights on a single model where you need 10 for a regiment will take you longer than ever to have it completed. Paint 10 to this stage, leave them to dry while you do the same to the riders and do it again tomorrow.
The next day

The next day starts with 3 steps all combined in the picture on the left:
a) Drybrush the entire fur with cold grey. This will make the fur on the model stand out.
a) paint the straps with leather brown. This requires a steady hand, just remember that these straps are raised, so keep your brush vertical compared to the model.
c) Furthermore, I used an edge highlight of polished gold on the armour plates. While this is no way required for a decently painted model, I find the edge highlights realy finishes the model.

To finish the model, I highlighted parts of the model with offwhite. As brocks are basically badgers, I highlighted the cheecks of the model white, as did I the back of the beast and the tail.
Finally, the teeth and claws were touched with offwhite well.
With this final touch, the model is finished. It’s painted to a good tabletop standard which is achieveable with just a few easy techniques.
Here’s the completed model:


A very nice, easy to follow tutorial
LikeLike